Call toll free 866-216-5308
The EASYGLUCO® Blood Glucose Monitoring System provides you with simple test procedures and fast, accurate and reliable results. Alternate site testing gives you more options to test your blood glucose from you forearm, thigh, calf and palm, as well as your fingertips.
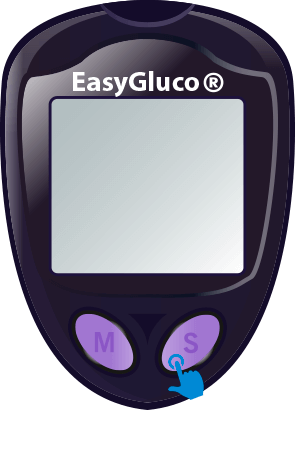
Power on the EasyGluco® meter by pressing the S button and holding for 3 seconds. The meter will beep and automatically power on.
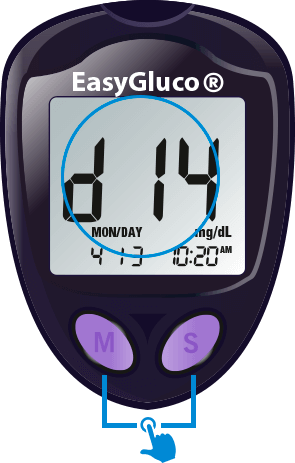
The setting mode begins with setting the average days. The meter is automatically set to 14 day averaging. In set mode, press the S button to change the amount of days you would like to see an average for. Holding down the S button will increase the number at a quicker rate. When you have reached the correct number of days for average, press the M button to save your setting.
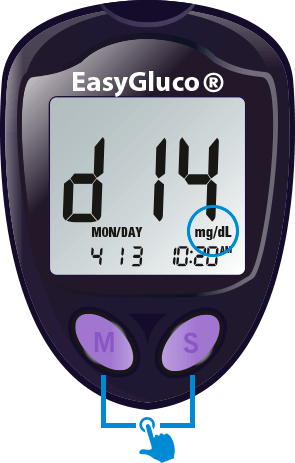
Your EasyGluco® meter is preset to mg/dL, which is the unit of measurement used in the United States. If you need to change this setting to mmo/L, press the S button to change from mg/dL to mmo/L. Once you have made your selection, press the M button to save your selection and advance to setting the date.
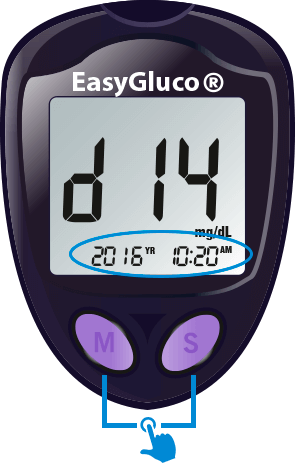
Press the S button to select the year. Once you have selected the year, press the M button to set the date. The month will be flashing, press the S button until you reach the correct month. Press the M button when you have selected the month. The day will be flashing, press the S button until you reach the correct day. Press the M button when you have selected the day.
Continue these steps to set the time. Once you have selected the time, press the M button to advance to the temperature setting.

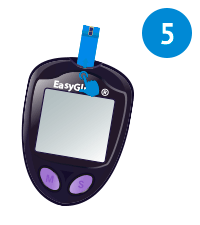
Before testing your blood glucose, you will need to code your EasyGluco® Meter. The code number on the meter must match the code number on the test strip vial. Insert a new EasyGluco® test strip into the test strip port of the EasyGluco® meter. The meter will automatically power on and the code will appear. Confirm the code on the meter is the same as on the test strip vial. If the code numbers are different, you will need to change the code on the meter to ensure they match. Press the S button to change the code until the number on the meter matches the one on the test strip vial. Once you have selected the correct number, press the M button. The test strip symbol will blink and now you are ready to test.
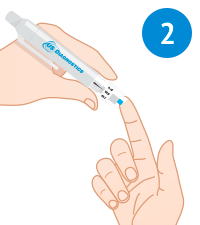
Place the end of the lancing device against your finger and draw blood.
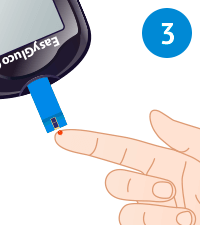
Please the blood from your finger to the tip of the EasyGluco® test strip. The test strip will automatically draw the blood.
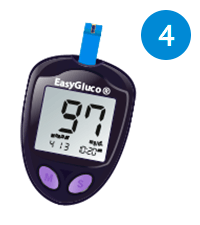
The meter will count down from 9 to 1 on the display. After 9 seconds, the meter will beep and your test result will be displayed on the screen.
Remove the test strip and discard.
Simply uncompress the .zip file which you have downloaded from one of the links above and run the Setup application.